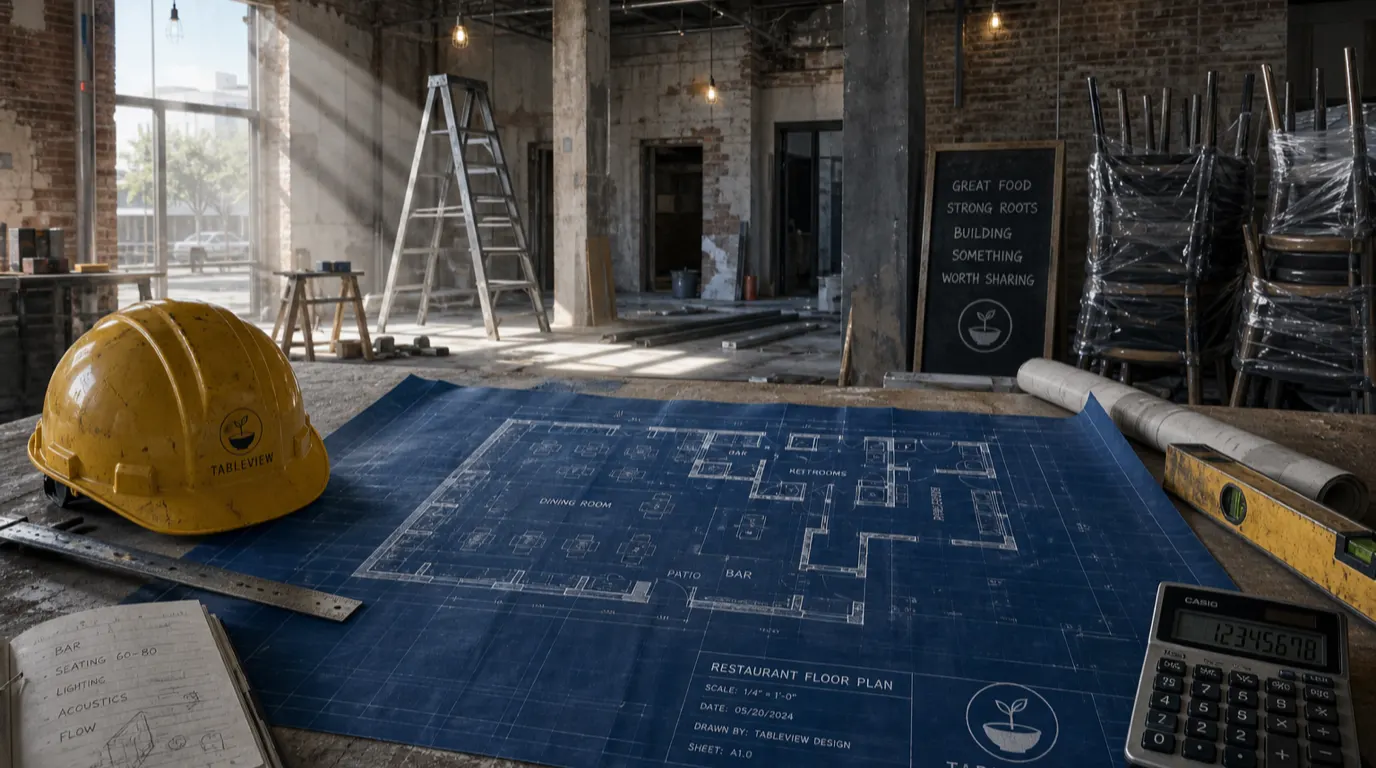
QR code menus arrived in restaurants the same week as the pandemic and most operators have never seriously revisited the decision they made then. The QR sticker on the table is still pointing to the PDF somebody uploaded to Google Drive in March 2020, the link is one domain redirect away from the bin, and nobody on the team can edit the prices without going through the manager who set it up. That version of QR menus has earned its bad reputation: slow to load, ugly to scan, impossible to update, and quietly losing the restaurant sales every shift.
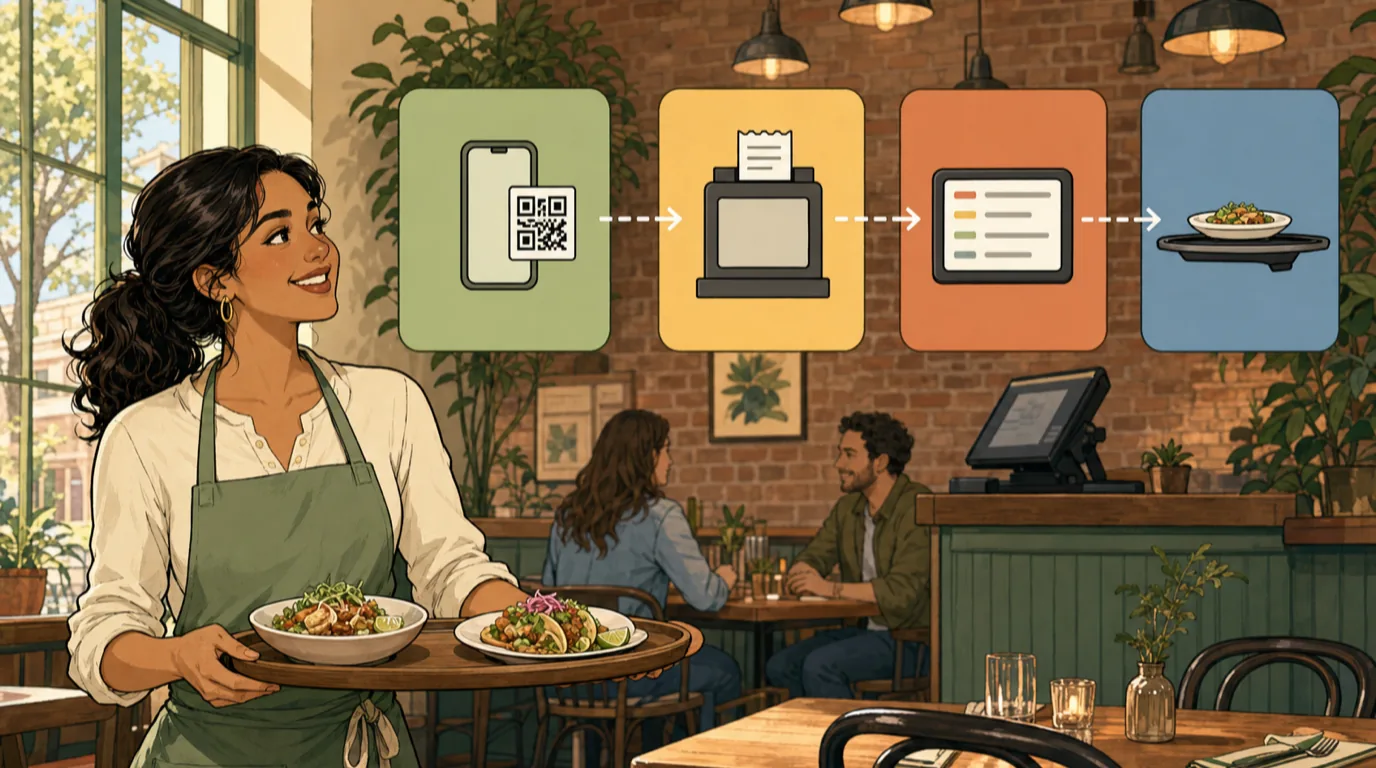
The 2026 version is a different product. Done well, a QR menu shortens the path from "guest is seated" to "first round is ordered" by two to four minutes, increases average ticket because the menu can upsell visually, and removes a meaningful chunk of the labor cost per cover by collapsing parts of the ordering job that previously sat on a server. This guide is the practical version: the three QR menu models worth choosing between, the design rules that make a sticker actually scan, the integration patterns that connect a QR to the rest of the restaurant tech stack, and the implementation checklist that gets you from sticker-on-a-table to a working system in thirty days.
The three QR menu models, and when each fits
Operators talk about "QR menus" as if there is one product. There are three, and they suit different formats. Picking the wrong one is the most common mistake we see.
Model 1: Static PDF menu
The QR points to a PDF hosted somewhere - the restaurant's website, Google Drive, a Dropbox link. Cheapest to set up; everything else about it is wrong. The PDF takes 6-10 seconds to load on cellular, does not work on every phone, cannot be edited without re-uploading, and offers nothing in the way of analytics, upsell, or accessibility. It exists because in 2020 nobody had time to do better.
Static PDF is acceptable only as a temporary fallback for a short-life event menu (a wine pairing dinner, a tasting menu run for a single weekend). For anything you expect to run for more than a month, move past it.
Model 2: Hosted digital menu (view-only)
The QR points to a web page that lives on your domain (or your menu provider’s subdomain). The menu is a proper responsive page, fast to load, editable in real time, can include photos, allergen filters, dietary tags, multi-language toggles, and a "call the server" button. Guests read; they do not order from the page; the server still takes the order on a handheld POS or notepad.
This is the right model for full-service formats where reading the menu and ordering it are different jobs - the customer still wants the human moment of ordering through a server, but the menu itself should be something you can update without printing. It is also the right model for bars and cocktail-led venues, where the hospitality is the point and a tablet on the table would kill the mood. Most independent bistros, neighbourhood Italians, and gastropubs sit here.
Model 3: Scan-to-order (fully integrated)
The QR points to a web page where the guest browses, builds an order, and pays. The order drops directly into the POS and the kitchen display system the same way a server-entered order would. The payment lands in the same till. The server's job shifts from "take the order" to "deliver the food, manage the room, and upsell" - which is the job they were hired to do anyway.
This is the right model for quick-service, fast-casual, food courts, hotel pool decks, sports bars at peak, food trucks with seats nearby, and any concept where the unit economics depend on covers per hour rather than ticket size. We typically see scan-to-order add 8-15% to average ticket because the menu visual sells more sides than a server pitch does, and trim 30-45 seconds off the door-to-first-order time. The catch: it requires integration work and the table turnover model needs to be re-thought, because the order arrives before the server has greeted the table.
Which model fits your format
- Fine dining, tasting menus, intimate bistros: Model 2. The hospitality is the differentiator; the QR is the menu delivery, not the order.
- Casual full-service, gastropubs, neighbourhood Italians, brasseries: Model 2 as default. Consider Model 3 for the bar seating only.
- Fast casual, counter-service, bowls, salads: Model 3. The guest expects digital.
- Sports bars, breweries, beer gardens, large patios: Model 3 for the patio (where servers cover too much ground), Model 2 inside.
- Food trucks, ghost kitchens, takeaway windows: Model 3, no question. See takeaway POS for the integration pattern.
- Hotels, F&B in resorts, room service: Model 2 for the restaurant, Model 3 for in-room and poolside.
Build a QR right now
Drop the URL of the menu page you want guests to land on into the generator below. It produces a QR with high error correction (so a small logo or sticker overlay still scans), in your brand colour, at print-ready sizes. Download the SVG for the print designer and the PNG for table-tents or laminated cards.
One thing the generator cannot tell you: the URL you point it at
should live on a domain you control. Pointing a QR at
bit.ly/3aXjY9 or a Google Drive PDF is the single most
common reason a QR menu stops working - the short-link service
changes terms, the share permissions expire, and the table-tent in
the corner of the room becomes a 404 in front of a guest who is
already hungry and now mildly annoyed.
Design fundamentals that determine whether the QR actually scans
Most "the QR is not working" complaints have nothing to do with the link. They are physical scan-failure problems. The five rules that fix 90% of them:
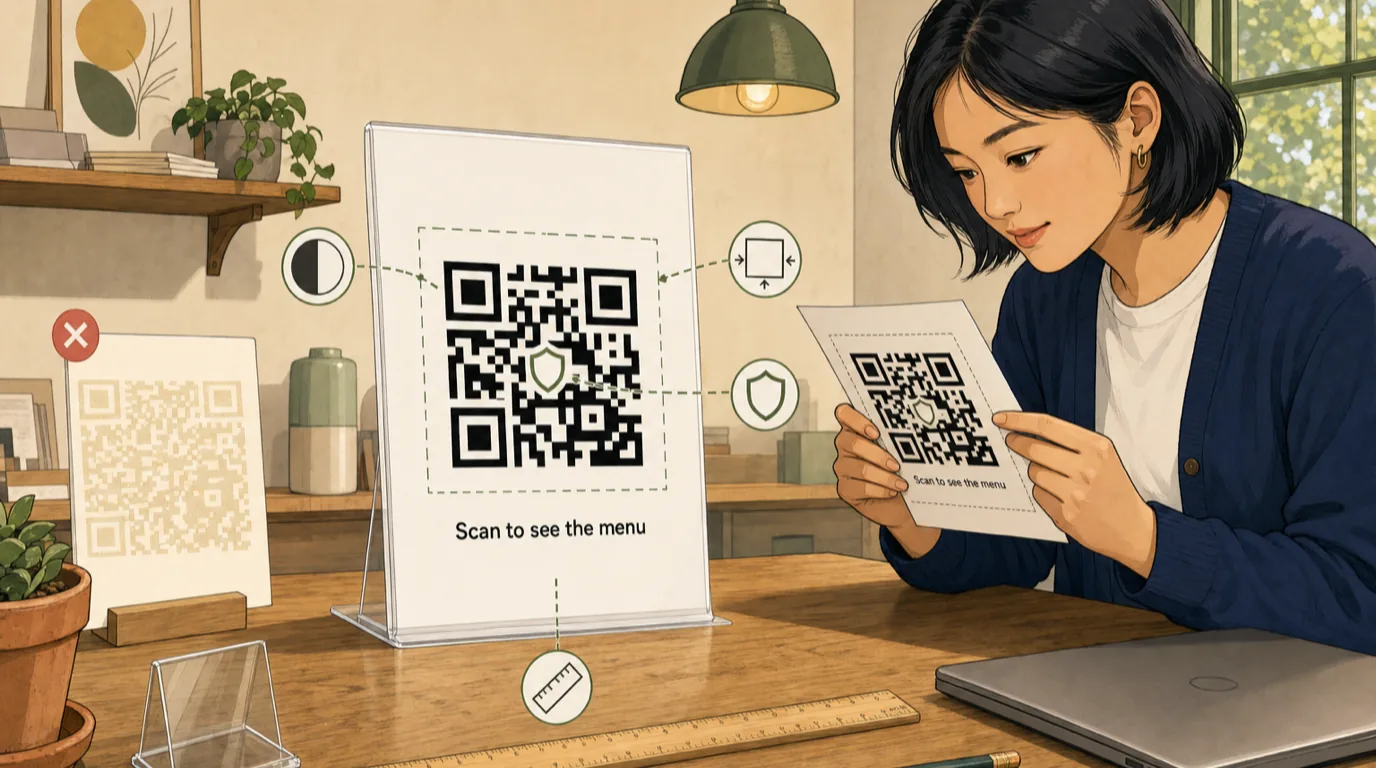
1. Contrast. Dark foreground on a light background. A black or near-black QR on white scans in milliseconds; a "brand on brand" QR (light brown on cream, navy on black) needs the camera to work harder and fails in dim light. Brand colour is fine for the foreground - it just has to be dark enough.
2. Size. The minimum printed size is 25 mm by 25 mm for a phone scanning at arm's length. For a table-tent that sits 30-40 cm away from the guest, 30-35 mm is the comfortable size. For a floor sign at a hotel buffet where guests scan from a metre away, the QR needs to be at least 60 mm. The rule of thumb: QR side length = distance to scanner / 10.
3. Quiet zone. The white border around the QR. Most scanners need at least 4 modules (the small squares the QR is made of) of clear space around the QR before they can find it. A QR crammed against the edge of a table-tent or jammed next to a logo will fail half the scans.
4. Error correction. Set to "high" (level H). It costs you some QR density but means the code still scans with up to 30% of its surface damaged, smudged with sauce, or covered by a small logo in the centre. The generator above defaults to H for this reason.
5. Physical material. Glossy lamination reflects light and causes scan failure under restaurant pendant lights. Matte laminate is the right finish. For outdoor tables, use UV-stable inks; sunlight bleaches a standard print job inside three months.
Where to place QR codes (and where not to)
The placement decision matters as much as the design. The placements that work:
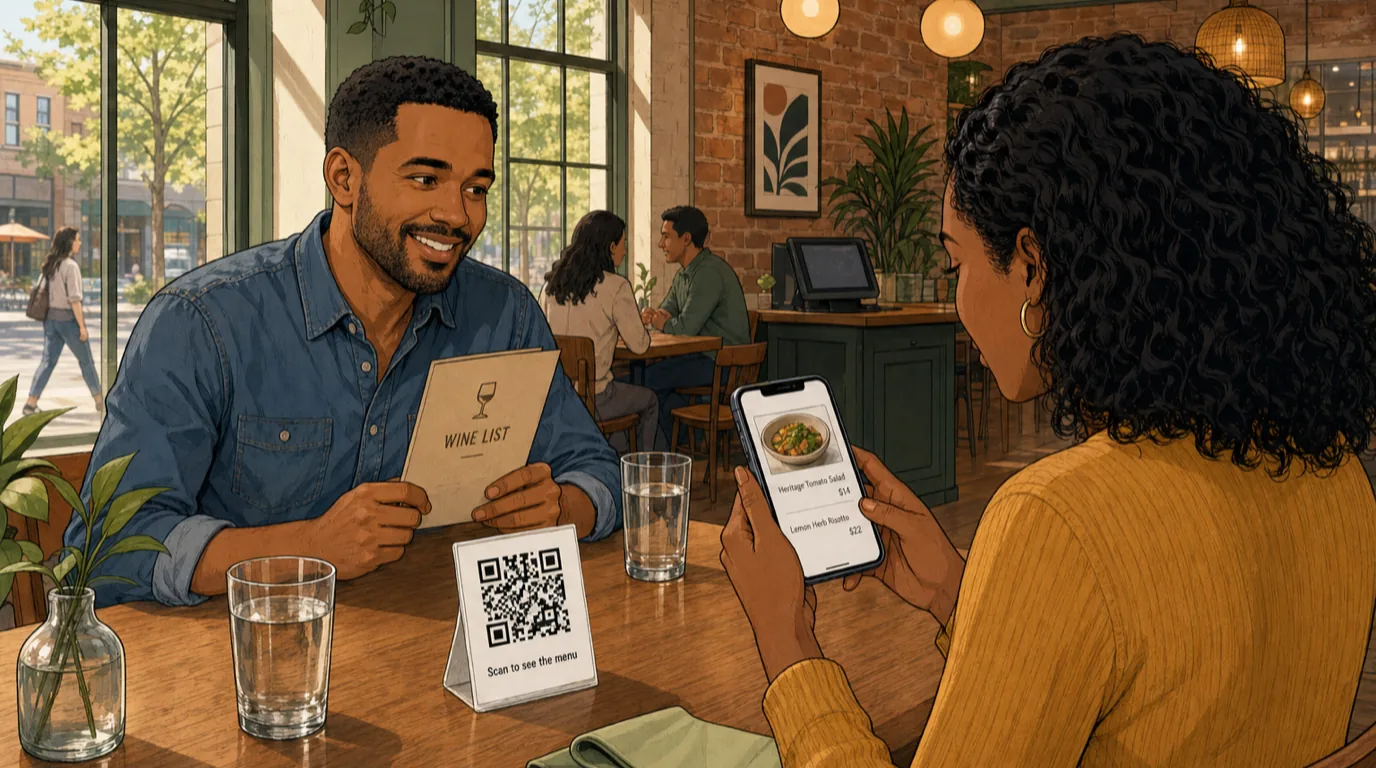
- Small acrylic table-tent at the centre of the table. The default. Two faces (so two guests can scan at once), 30-35 mm QR, short caption ("Scan to see the menu" or "Scan to order"). Replaces the printed menu entirely.
- Sticker on the corner of the table. Cheap, works for bar tops and high-tops where a table-tent is in the way. Vulnerable to spills.
- Coaster, napkin, or place mat print. Lower scan rate (guests need to lift the coaster). Useful as a backup, not the primary.
- Outside the front door + on the window. A QR that opens the same menu page guests see at the table is also a marketing asset for walk-by traffic. Adds an indexable URL for local SEO.
- On the receipt and at the host station. For the takeaway-order-online ask: the receipt QR is the cheapest customer acquisition channel a restaurant has, and the host-station QR captures the guest who walked in but the wait is too long.
The placements that do not work: tiny QRs on the back of a printed menu (guests do not flip the menu over), QRs on the wall behind the bar where the bartender blocks the line of sight, QRs printed on shiny black plastic that reflect the pendant lights into the camera.
The scan-to-order flow: how it should integrate
If you are running Model 3, the integration shape decides whether the system is helpful or actively harmful. The integrations that matter, in order:
POS integration. The scan-to-order page writes directly into the POS as if it were a server, with the table number attached. Items, modifiers, special requests, and the bill all land on the same ticket as anything the server adds later. Without this, you end up with two parallel tills, two parallel receipts at close, and a labour cost spike from manually reconciling them. See restaurant order management for the deeper shape.
KDS integration. Tickets generated from QR orders arrive on the same kitchen display system as server-entered tickets, with the same channel, course, and timing metadata. The kitchen does not need to know whether the order came from a server or a phone; the work is identical. Hide the channel source on the KDS line - it is a distraction and slows expediters down.
Payment integration. The guest's card lives inside the scan-to-order flow; the payment terminal is bypassed. The bill closes when the guest taps "Pay" on their phone, not when the server brings the dataphone. This is where the biggest service-time improvement comes from - the end of meal is no longer a 5-7 minute "chase the server for the bill" event.
Course pacing. The kitchen still needs to know the order is fired. The integration should let the server fire each course (or auto-fire on a timer); the QR submits the order, but a human still decides when the kitchen starts cooking it. Without this, mains can land before the starters are cleared.
Server visibility. The server who covers the table sees the order arrive in real time on their handheld and can modify, comp, or void as if they took it themselves. Hiding QR orders from the server is the worst mistake operators make rolling out scan-to-order - it removes the server's ability to manage the table and turns hospitality into pure logistics.
Sit-and-pay without scan-to-order (Model 2 + payment)
A halfway house worth knowing about: the menu is still read on the QR page, the server still takes the order, but at the end of the meal the guest scans the bottom of the bill to pay from their phone rather than waiting for the dataphone. This is the pay-at-table pattern without the hardware - and for a casual restaurant where the bill close is the longest part of the meal, it is often a bigger win than the full scan-to-order rebuild.
The technical requirement is that the receipt printer prints a QR that encodes the bill ID and a deep link into the payment processor. The guest scans, chooses a tip, and the bill closes inside the POS the moment the payment confirms. Servers love it because they reclaim the bill-close time; finance loves it because the tip handling is cleaner; guests love it because the meal ends when they decide it ends, not when the server has time.
Accessibility: do not ship a QR menu that excludes guests
The QR-only menu has a real accessibility cost that is easy to miss. Older guests without smartphones, guests with vision impairments, guests whose phones are dead or out of cellular data - all of them are guests you do not want to turn away. Five practical rules:
- Keep three to five printed menus at the host station. On request, no questions asked. This is the single most important accessibility decision and the cheapest to implement.
- The QR menu page must be screen-reader friendly. Heading structure, alt text on dish photos, no all-images-of-text menus. If the menu is a PDF, the PDF must be tagged for accessibility (most PDFs are not).
- Allergens and dietary tags must be filterable. "Show me only the vegan items" is a query the QR menu can answer faster than the server. If your printed menu already lists allergens, the digital version should let the guest filter on them.
- Large-print toggle. A simple "AA" button at the top of the menu page that doubles the font size. Costs nothing, matters to a meaningful slice of guests.
- Multi-language toggle. A QR menu page can present the menu in five languages without printing five menus. For local SEO this also helps - each language version is a separately indexable page.
The ADA in the US, the Equality Act in the UK, and the European Accessibility Act all explicitly cover digital menus as part of public-facing service. Treat the QR menu as the same accessibility asset you treat your website.
Tracking what works: dynamic QR codes, UTM tags, and A/B tests
The reason a QR menu is more powerful than a printed one is that you can measure it. The two technical pieces:
![]()
Dynamic QR codes. The QR encodes a short URL that your system controls and 302-redirects to the current menu page. The benefit: you can change where the QR points without re-printing the table-tents. If you launch a new menu, change a price, or move the ordering URL, the existing QR stickers keep working. The cost is a small monthly fee for a QR management service, or your own URL shortener if you have engineering capacity.
UTM parameters per placement. The same menu URL, served from different QRs, with different UTM source tags - one per placement. Now you can answer questions like: do guests scan the QR on the table or the QR on the window more often? Does the receipt QR drive more repeat orders than the host-station QR? This is the data that pays for the QR programme.
A/B test the menu structure. The QR menu lets you test which arrangement of dishes sells the most without re-printing anything. Move the high-margin items to the top; test it for two weeks; check the menu engineering matrix. This is the version of menu engineering printed menus never allowed because the production cycle was too slow.
One scan metric worth tracking is "scan-to-order conversion" - what percentage of guests who scanned the QR also placed an order through it. Healthy is 60-75% in Model 3 (the rest order through the server). Below 40% usually means the menu page is slow, the design is confusing, or guests are bouncing because the page asks for too much before they can see the food.
Common mistakes that quietly kill QR menus
The mistakes we see most often, in rough order of how much damage they do:
- Pointing the QR at a slow page. Anything above 3 seconds to first paint and a meaningful share of guests give up. Hosted PDFs and uncached menu builders are the worst offenders. Run the menu page through PageSpeed; aim for under 1.5 seconds first content on cellular.
- No fallback when cellular dies. Restaurants in basements, in concrete buildings, with bad cellular coverage. The menu page should ship a service worker that caches the menu after first scan, so subsequent guests at the same table do not need cellular to see it.
- Asking for email or login before the menu loads. The QR is in the way of the meal; treating it as a marketing capture moment loses the guest. Put the email ask at the bottom of the menu or on the receipt, never the front door.
- No human signal that the QR is the menu. A QR on a table without a caption can be mistaken for a payment QR, loyalty QR, wifi QR, or table-number QR. Always include the line "Scan to see the menu" or "Scan to order" in 10-12pt text below the code.
- Forgetting to update the QR when the URL changes. If you use a static QR (not dynamic), changing the URL means re-printing every QR in the restaurant. Use dynamic QRs unless you genuinely never plan to change the destination.
- No way to call the server from the menu page. A "call the server" button next to the menu (which dings a handheld) solves the "I want to ask a question" problem that scan-to-order otherwise breaks.
Compliance and data: what you collect when guests scan
Under GDPR (EU), CCPA (California), LGPD (Brazil), and several other emerging frameworks, the data you collect from a QR scan is personal data the moment it can be tied to a specific user. The practical implications for a QR menu:
- The QR scan itself is not a consent event - the guest scanning the code has not agreed to anything. The page they land on can use strictly necessary cookies; everything else (analytics, advertising, remarketing) needs explicit consent before it fires.
- Order data (what the guest ate, when, how much they spent) is personal data once attached to a phone, email, or account. Storage needs the lawful basis declared in your privacy policy.
- The privacy policy must be linked from the menu page, not buried in the footer of the main website. Most guests will not read it; that is fine, but it must be reachable.
- If the menu page sets a cookie that tracks the guest across sessions, that is a tracking cookie and needs consent.
The good news: a well-designed scan-to-order flow can collect exactly enough data to run the loyalty programme and the marketing funnel, and exactly nothing more. The restaurant marketing side of this is a topic of its own; the legal side is the kind of thing your menu provider should already have figured out.
A 30-day implementation plan
If you are bringing a QR menu live for the first time, or replacing the static PDF that has been live since 2020, here is the sequence we use to get from decision to working system in a month.
Week 1: choose the model and the menu page. Decide Model 2 or Model 3 (Model 1 is not on the table; if your budget says it has to be, run Model 1 for one month and then plan the Model 2 migration). Get the menu page live on your own domain. Confirm it loads in under 1.5 seconds on cellular. Add allergen filters, large-print toggle, multi-language toggle.
Week 2: print and place. Generate dynamic QRs with UTM tags per placement (use the generator above for the initial batch; switch to a dynamic QR service before you scale). Print at the sizes from the design section. Place at table-tents, the host station, the window, the receipt. Train the team on the new flow.
Week 3: measure and trim. Watch the scan-to-order conversion (if Model 3), the average time from scan to first order, and the support questions guests ask the servers. Anything that generates a recurring question is a UX problem on the menu page; fix it.
Week 4: integrate with the rest of the stack. Confirm the POS, KDS, and payment terminal all see the orders. If the till is reconciling cleanly, the rollout is done. Add the QR-based loyalty enrolment on the receipt. Look at the menu engineering data and run the first A/B test on item ordering.
Most restaurants we see do this hit a steady state inside thirty days. The ones that take longer are the ones that tried to roll out Model 3 before the POS integration was in place; do not skip that step or you will spend the first ninety days reconciling tills by hand.
Where to take this next
A QR menu is one layer of the restaurant tech stack, specifically the customer ordering layer that sits above the POS and feeds the KDS. The pieces that make it actually pay back are the integrations into the rest of the stack: the order management system, the menu management system that lets you update prices once and have them propagate everywhere, and the POS with native online ordering that treats a scan-to-order session and an in-room order as the same kind of ticket.
If the goal is not just "ship a QR" but "ship a QR that moves the P&L", the metrics that prove it worked land in the same place all our other operator metrics do: average ticket on the P&L statement, labour cost per cover on the labour cost report, and covers per hour on the table turnover dashboard. A QR menu that does not move any of those four numbers in a quarter is not a QR menu, it is a sticker.
Read next: Self-Ordering Kiosks for Restaurants: The 2026 Operator's Guide (with Free Kiosk ROI Calculator) and Restaurant Order Management System: What Is It, How To Use It and The Restaurant Tech Stack in 2026: A 7-Layer Architecture Guide.